Simply Sync Password Server Installation and Configuration
Simply sync password server Installation [Download]
Before You Begin
Objectives
After completing this installation on a computer, the computer will be aware of any password changes and will synchronize those changes on target domain controller:
Prerequisites
Before attempting this installation step, please ensure the target has the following pre-requisites:
- NET Framework 3.5
- Certificate
For Windows Server 2003, you must also install Windows Imaging Component (WIC) on the target computer:
Simply Password Sync Server Installation
You are an administrator for a company which currently maintains several Domain Controllers. A decision has been made to implement Simply PW Sync Server to take advantage of password synchronization, to solve administrative challenges and to reduce operating costs. The password synchronization capability will allow the company to deliver the functionality and simplicity of single sign on into a distributed environment.
Components of Password Sync Server
-
PWSync Façade Service
- This service receives password change from password client agent.
-
PWSync Server Service
- This service raise password change event and pass user id and password to server agents.
-
PWSync Active Directory Agent Service
- This is default agent which receive password change event from PWSync Server service and apply password change to target active directory.
Deploying Simply Sync Password Server
Download password sync server and extract to any local drive.
In this document, we will use x64 bit module.
Install PWSync Server
In the previous tasks, you ensured that your environment met all of the prerequisites for installing a PWSync Server. In the following task, you will install PWSync Server on the appropriate computer.
1. Logon to Domain Controller as Domain Administrative.
2. On Server, Run Windows Explorer and find PWSyncServerInstaller64.msi in target folder.
3. Run PWSyncServerInstaller64.msi.
If .NET Framework 3.5 is not installed. .NET Framework 3.5 installation windows will pop up. If yoiu are prompted you should install .NET Framework 3.5 and Reboot computer
For Windows Server 2003, you must also install Windows Imaging Component (WIC) on the target computer before .NET Framework 3.5 installation:
4. On the Welcome page, click Next.
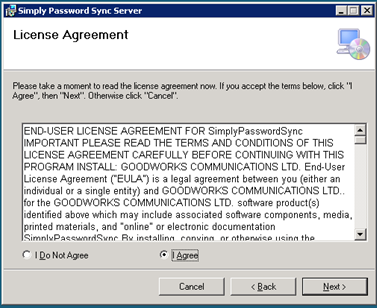
5. On the License Agreement page, select I Agree and then click Next.
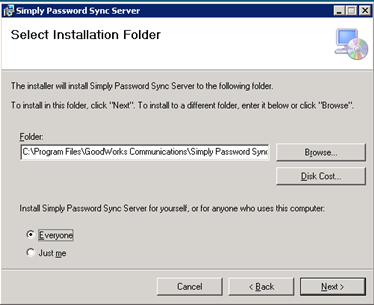
6. Browse folder location to install and Choose Just me or Everyone. On the Network Credentials page, click Next.
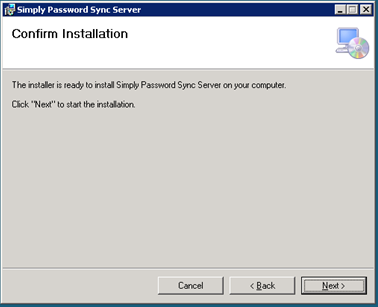
7. On the Confirm Installation page, click Next..
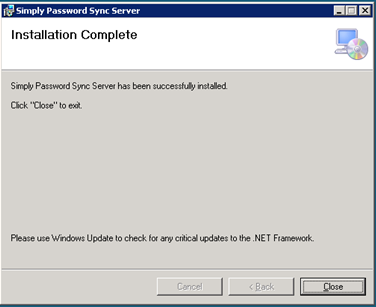
8. On the Installation Complete page, click Close.
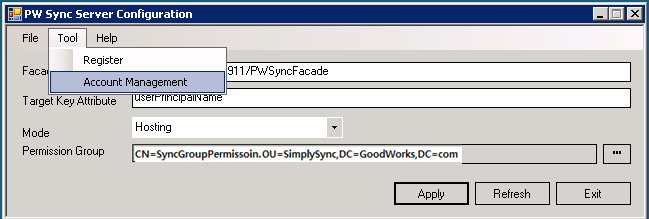
9. On Server, Run Windows Explore and locate install folder. Execute PWSyncServerConfiguration.exe Run “PWSyncServerConfiguration” as Administrator
10. Review Information on PW Sync Server Configuration page. Put URL to Façade Endpoint
server.domain.com should matched the certificate subject nameYou can use Temporary Certificates or selfsigned certificate.
Makecert -r -pe -n CN="encryption.domain.com" -b 12/25/2010 -e 12/22/2020 -eku 1.3.6.1.5.5.7.3.1 -ss my -sr localmachine -sky exchange -sp "Microsoft RSA SChannel Cryptographic Provider" -sy 12
- Makecert.exe (Certificate Creation Tool)
- How to: Create and Install Temporary Certificates in WCF for Transport Security During Development
"PWSync Facade Service" should be restarted whenever change server configuration. new configuration will not take effect until you stop and restart service
11. Select Mode.
• Hosting: for Hosting environment (Multi-tenant environment)
• Enterprise: for enterprise environment
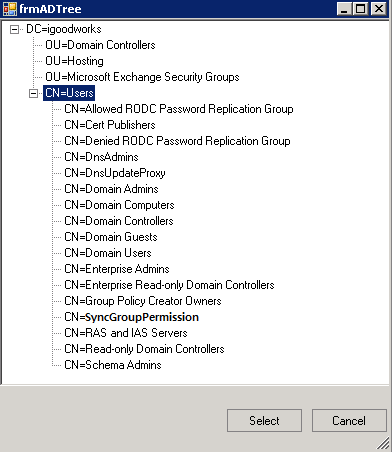
12. Choose button “…” on right side of Permission Group text box and choose Security Group.
For Permission Group, It doesn’t have to have any permission.
Only member of this group will be accessible for synchronization.
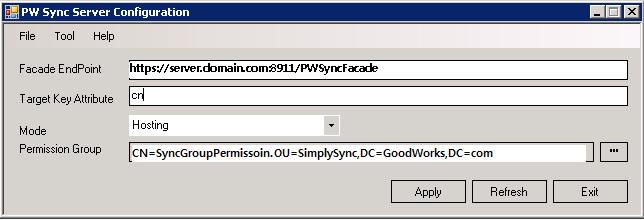
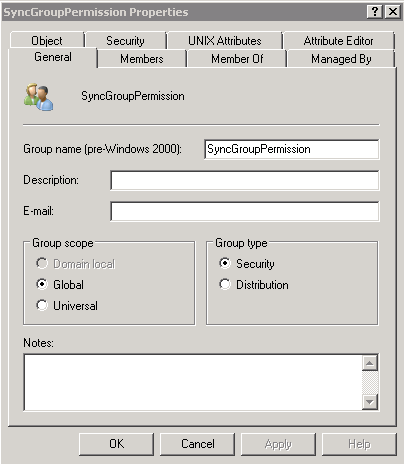
We assume that SyncGroupPermission was created as Security Group
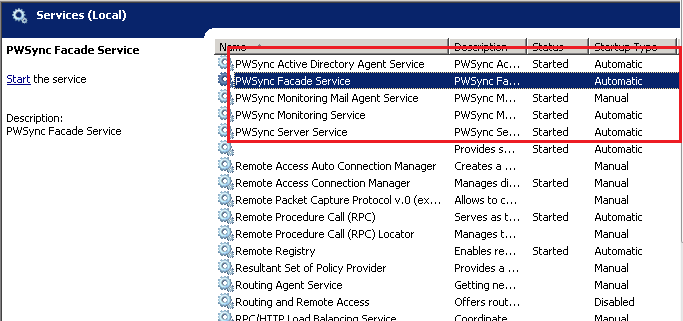
13. Confirm PWSync Façade Service, PWSync Server Service, PWSync Active Directory Agent Service, PWSync Monitoring Service, PWSync Monitoring Mail Agent Service exist on service list.
Start "Configure PWSync Server service"
PWSync Active Directory Agent Service, PWSync Monitoring Service, PWSync Monitoring Mail Agent Service, PWSync Server Service are started, however PWSync Façade Service status would be “Stopped”.
Let's start "Configure PWSync Server service" part.
Change "Active Directory Agent Service" service account which should have permission to reset user password.
Register PWSyncServer license key
1. On Server, Run Windows Explore and locate install folder. Execute PWSyncServerConfiguration.exe
3. Choose Tool -> Register
Type license key. To get license key, contact info@igoodworks.com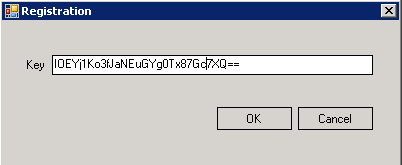
Configure PWSync Server for Client access
Create client account and configure
In the previous tasks, you installed and configure PWSync Server. In the following task, you will create and configure client access account.
1. On Server, Run Windows Explore and locate install folder. Execute PWSyncServerConfiguration.exe
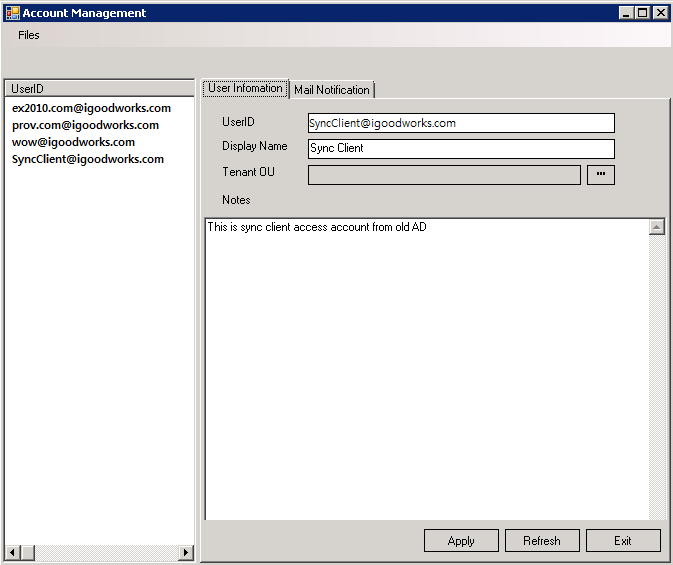
2. Choose “Tools’ and “Account Management”.

3. To create account for customer access. Choose “Files and New User”. Fill out user information This account should be created per customer domain in case of hosting environment. Note. Don’t give any other permission to this account. This account is only to check authentication.

In case of “Hosting” mode, you have to choose “OU Location” which customer OU. Only users in this OU will be synced though this client access account. In case of “Enterprise” mode, leave blank in “Organization Unit” field
Configure notification and monitoring
In the previous tasks, you created client access account In the following task, you will configure email notification and monitoring service
1. On Server, Run Windows Explore and locate install folder. Execute PWSyncServerConfiguration.exe Choose “Tools” and “Account Management”
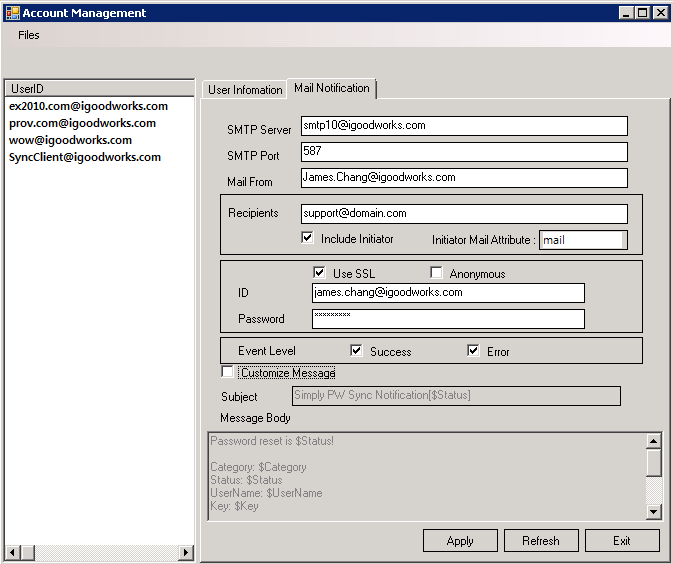
2. Click user and Click on “Mail Notification” tab
• SMTP Server: SMTP server address
• SMTP Port: SMTP port number
• Mail From: Sender email address
• Recipient: Recipient email address (it could have only one email address)
• Include Initiator: mail will be sent if this is checked.
• Initiator Mail Attribute: AD attribute name which has initiator email (Default is mail which Email filed on AD)
• Use SSL: SMTP server authentication use SSL, this should be checked
• ID: SMTP authentication ID
• PW: SMTP authentication id’s password
• Anonymous: if SMTP server doesn’t need authentication, this should be checked
• Event Level: notification level. If “Success” and “Error” are checked, mail notification will be sent in both cases.
• Customize Message: Message body can be modified by checking this option